Showing posts with label Upcycle. Show all posts

Monday, October 8, 2012

What I Wore to Display An Art Piece


I think I am going to start a new section called What I Wore to this blog. I hope to make it regular but it might be a bit sporadic after all. I find fashion fun. By no means do I know a lot about it, but I like it. I think it should reflect your personality, be comfortable, appropriate, and presentable (in good condition). In fact, that reminds me of a post I wrote  for my Loveshine365 blog (devoted to my etsy.com store).
I made this skirt from some fabric that I could not pass up at Hancock Fabrics and paired it with white spaghetti strap, red cardigan (thrift store $5) and some dandy red heels.
To Display An Art Piece

I wore it last week to display an art piece that I created for a local church here in Baytown, St. Mark's Methodist. 

Monday, March 19, 2012

My Adventure Into Steampunk; Upcycle File Cabinet


So, I didn't even know it had a name. My admiration for metal, fantastical Victorian drawings, old mixed with new, bronze. Apparently, I like Steampunk. Or, at least, I dream of decorating parts of my house that way, and incorporating elements of it into my wardrobe. I was not introduced to the proper name until I had conjured ideas in my head for certain areas of my house and searched for pictures to see if I could find items to make it a realization. I kept running into the word "Steampunk" when I would find pictures I admired. I had never heard of it before.

 I am now not even sure that my taste and ideas completely match with hardcore Steampunkians, so I am a little timid to use the label. I have a feeling my style is also "Industrial." Either way, I worked on this side entryway to our house. My main project was the file cabinet. Which was originally a beat up grey cabinet that somebody used in their garage.

I found it on Craigslist for $10. Cleaned it up, painted it bronze. I then bought original glass typewriter keys and glued them underneath the handle. You cannot see it in the picture but the cabinet is on four sturdy wheels.The decorations came from two different thrift stores near my house. On the left is a bronze clock that looks like the wheel of a ship and has a map for the face. In the middle is a man on a bicycle made from nails and bolts. Lastly, is an old exterior light fixture. I liked the shape of it and figured it could hold pens or something else. Above is a print that I bought from Etsy.com from this shop http://www.etsy.com/shop/PRRINT (highly recommend taking a look). And I framed it with a frame I found at the same thrift store I got the bicycle man at. I found the key holder at the store where I got the clock and light and bought it for $1 and painted it yellow.

Altogether, I am pleased with the outcome! Hope you enjoyed looking.

Tuesday, January 24, 2012

Floating Bookshelves; Make Bookshelves Out of Books


One of my favorite rooms in our house is our library. 

It is filled with books, cozy, and a reflection of our personality.

I believe strongly in continually learning no matter how old you are and books are just waiting to be read and all their information soaked up. 

The owl rug has a whole post dedicated to its creation. 

The walls are wood paneling that are covered with three coats of Kilz and two coats of Behr Silver Dust. I cleaned and covered the couch. Put up a great statement about our family in wood letters that I painted and hung.

 But the individual project I am most proud of is the floating bookshelves I made above the couch. I plan on making another row as soon as the novelty of pulling books down wears off for Elijah. 

Here is a picture of our library.

Our Library


I can take the credit for the design of our library but not the idea of the floating bookshelves. I found a how-to video after long searching for some cool floating shelves to put above the couch. Although, I felt guilty cutting and gluing books at first, I consoled myself with the idea that these particular books may never have had a home if I had not rescued them. Plus, I am displaying great literature on my wall.  I have a copy of each of the books I used for a shelf in my library and have read most all of them.

Here is the video I used to make the shelves:


Thursday, October 27, 2011

Etsy Store

My friend, Natalie, and I are soon opening a new Etsy store and we have yet to come up with a name for it, but below is a sample of the items that will be available.
"Dirt is your friend." I think more than the words "adventure, confidence, strength" this embodies something I wish little girls were given to ponder and something I wish was demonstrated for them.
The dresses, dolls, and bibs are from recycled t-shirts because we want everything about the store to embody our values and envision them being passed down through the what we make. Resourcefulness, loving the earth God has given us, and enjoying sunshine, rain, words, music, the strength, wonder and beauty of our bodies. Enjoying food and laughing and dancing. Adventure, confidence, strength, getting messy. Hopefully, little girls will be encouraged in this way and one day they will grow up to be interesting, confident women.
If anyone has an idea for a name, leave it here. We will let you know when our store is open!
Cheers!

Saturday, July 23, 2011

Headboard

I found this door at an antique store. I scored it by talking to the owner of the booth and telling her about my project. She was using it to display other items so it had a lot of nails in it but I got it for the price I had set in my head ($20).


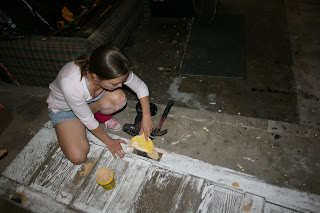
The door had a lot of nails in it and the hinges were a bad sort of rusty so I had to pry the nails out and unscrew the hinges. Then I took care to putty all the holes. Then I sanded it with an orbital sander and by hand.


The next step before was to cut the door to make it symmetrical.


Then I sanded it with a finer grit before painting it. For some reason I don't have a picture of it after I painted it white. But it took 4 coats to sufficiently cover it.

After I painted it white, I taped the five panels around the edges with painter's tape. Then I painted two panels on each side dark brown. I traced an outline of two birds in the middle panel and let it dry.


Then I painted around the outline. It took 3 coats total. I also did not get a picture of the back, but I used picture hanging kit. Attaching two d-rings to the back and looping wire to each one. Then I screwed a hook into the wall to hang it up. Here it is:

Follow me on Twitter